

Create a Material with the wizard
The Material creation wizard walks you through setting up a new Material one step at a time. It gathers everything a Material needs — its type, details, fields, data channels and team — and creates it in one guided flow.
Start the wizard
Section titled “Start the wizard”From the All Materials list, select Setup Material. The wizard opens at the first step. Use Back and Continue to move between steps; you can review everything before anything is created.
The wizard has seven steps:
- Material type
- Material Details
- Material Fields
- Data channels
- Users
- Automation Setup
- Review
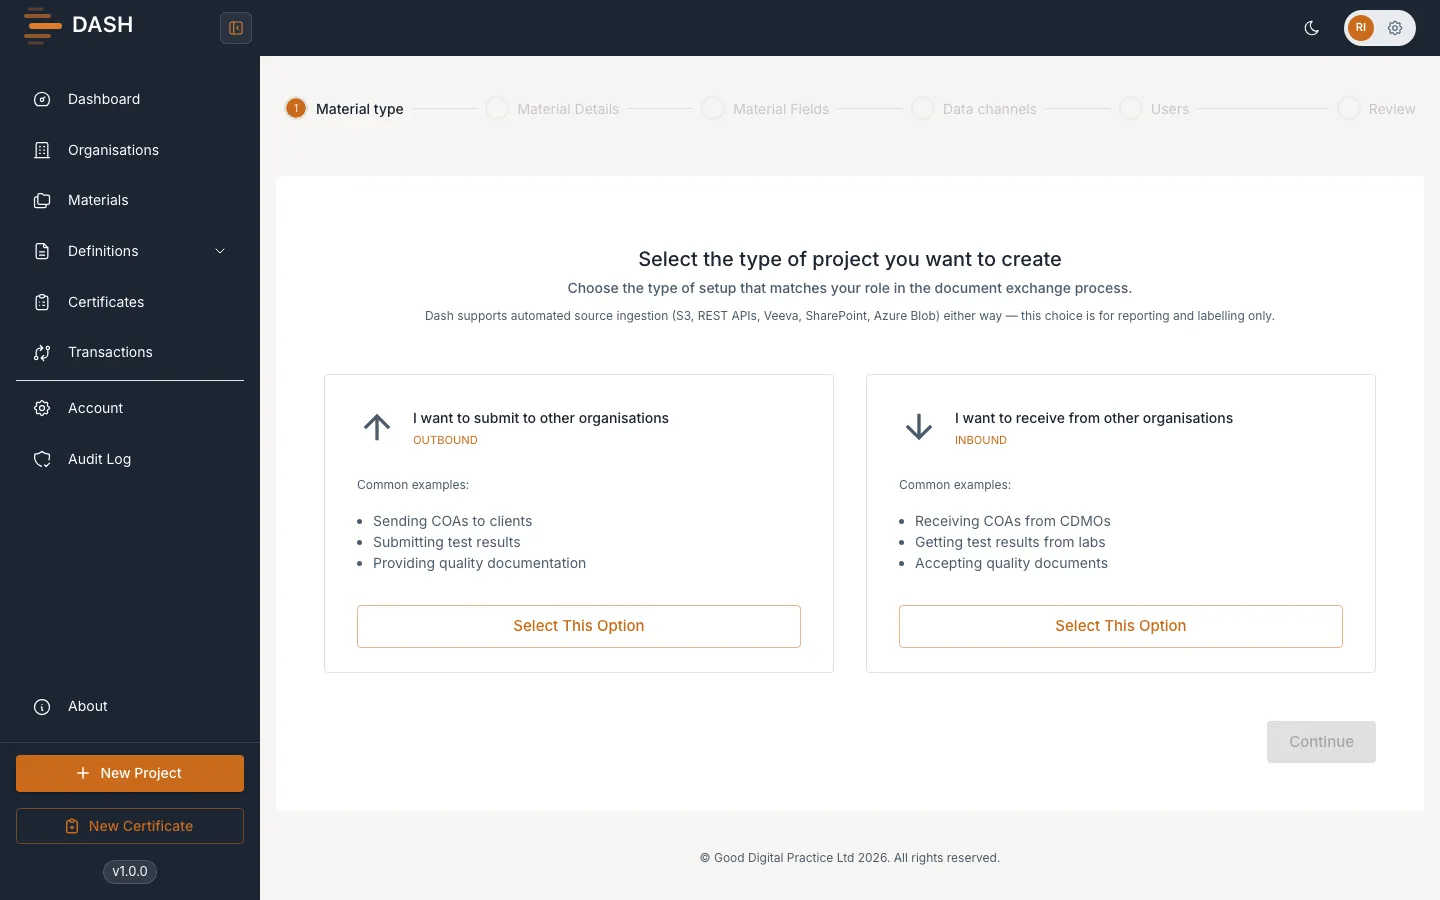
Step 1 — Material type
Section titled “Step 1 — Material type”Choose how documents will flow:
- I want to submit to other organisations (outbound) — a Supplier Material.
- I want to receive from other organisations (inbound) — a Receiver Material.
Select the option that matches your work, then Continue.
Step 2 — Material Details
Section titled “Step 2 — Material Details”Give the Material its identity and set how dates are handled.
- Enter a Material Name (required) and an optional Material Description.
- Choose the Organisation: Use an existing organisation and pick one, or Create a new organisation and give it a name (it’s created when you continue).
- Under Output Date & Time Format, choose a Date format for how dates appear on generated documents. Leave it on No conversion — keep original ingested dates to keep incoming dates as-is, or pick a preset (or Custom…) to standardise them. Tick Source dates are day-first if your incoming dates read day before month (for example 03/04 meaning 3 April). See Material fields & dates for detail.
Step 3 — Material Fields
Section titled “Step 3 — Material Fields”Add any custom fields that should appear on every document for this Material — for example a lot number or customer reference. Select Add Field, then give each a Field Name, optional Description and optional Value. You can skip this step and add fields later. See Material fields & dates.
Step 4 — Data channels
Section titled “Step 4 — Data channels”Configure how documents move in and out of the Material, grouped into three tabs:
- Source Data Channels — inbound sources DASH polls to create submissions automatically.
- Submission Data Channels — where approved documents are sent to the receiving organisation.
- Storage Channels — where approved Certificates are archived.
Select Add Channel on the relevant tab to configure one, and Test Connection to check it works. See Data channels overview.
Step 5 — Users
Section titled “Step 5 — Users”Select the account members who should have access to this Material. Filter by name, email or role, tick the users you want (or Select all), and Continue. You can leave this empty and add users later — see Assign users to a Material.
Step 6 — Automation Setup
Section titled “Step 6 — Automation Setup”If you added Source Data Channels, this step lets you test each one, fetch a sample document, and pin an existing Definition Map so the channel can start ingesting automatically. You can skip any of these and finish the mapping later from the Material’s Data channels tab. See Configure polling.
Step 7 — Review
Section titled “Step 7 — Review”Review everything you’ve entered — details, organisation, fields, channels and team. Go Back to change anything, then select Save and Exit to create the Material. On confirmation the Material is activated and assigned its identifier.